How to Withdraw from Binance to OneKey: Choose the Right Network and Complete Wallet Verification
Key Takeaways
• First confirm that your Binance account can currently make on-chain withdrawals before you begin. • Binance and OneKey must use the same network; the same coin does not mean the same network. • When the address is controlled by you in OneKey, choose self-custody wallet; specific questions and verification methods follow the account page.
Binance may offer different functions depending on the country and account type. This article applies only to users whose account page still allows on-chain withdrawals, and does not discuss trading, fiat withdrawals, or regional eligibility.
Check your account status first
Open the Binance withdrawal page and account notifications:
- If the page can start an on-chain withdrawal normally: continue following this article.
- If the page says the service is restricted but allows existing assets to be withdrawn: follow the deadline and steps in the notice.
- If the page does not allow withdrawals or the account is under review: do not try to bypass the restriction; contact Binance official customer support.
Do not judge based only on secondhand messages like “all European users can” or “no European users can.”
Step 1: Get the receiving address in OneKey
- Open the OneKey app and enter the target account.
- Click “Receive”.
- Select the asset and network you want to receive.
- If a OneKey hardware wallet is connected, verify the full address on the device screen.
- Copy the address, and note the token, network, and any memo or tag that may be required.
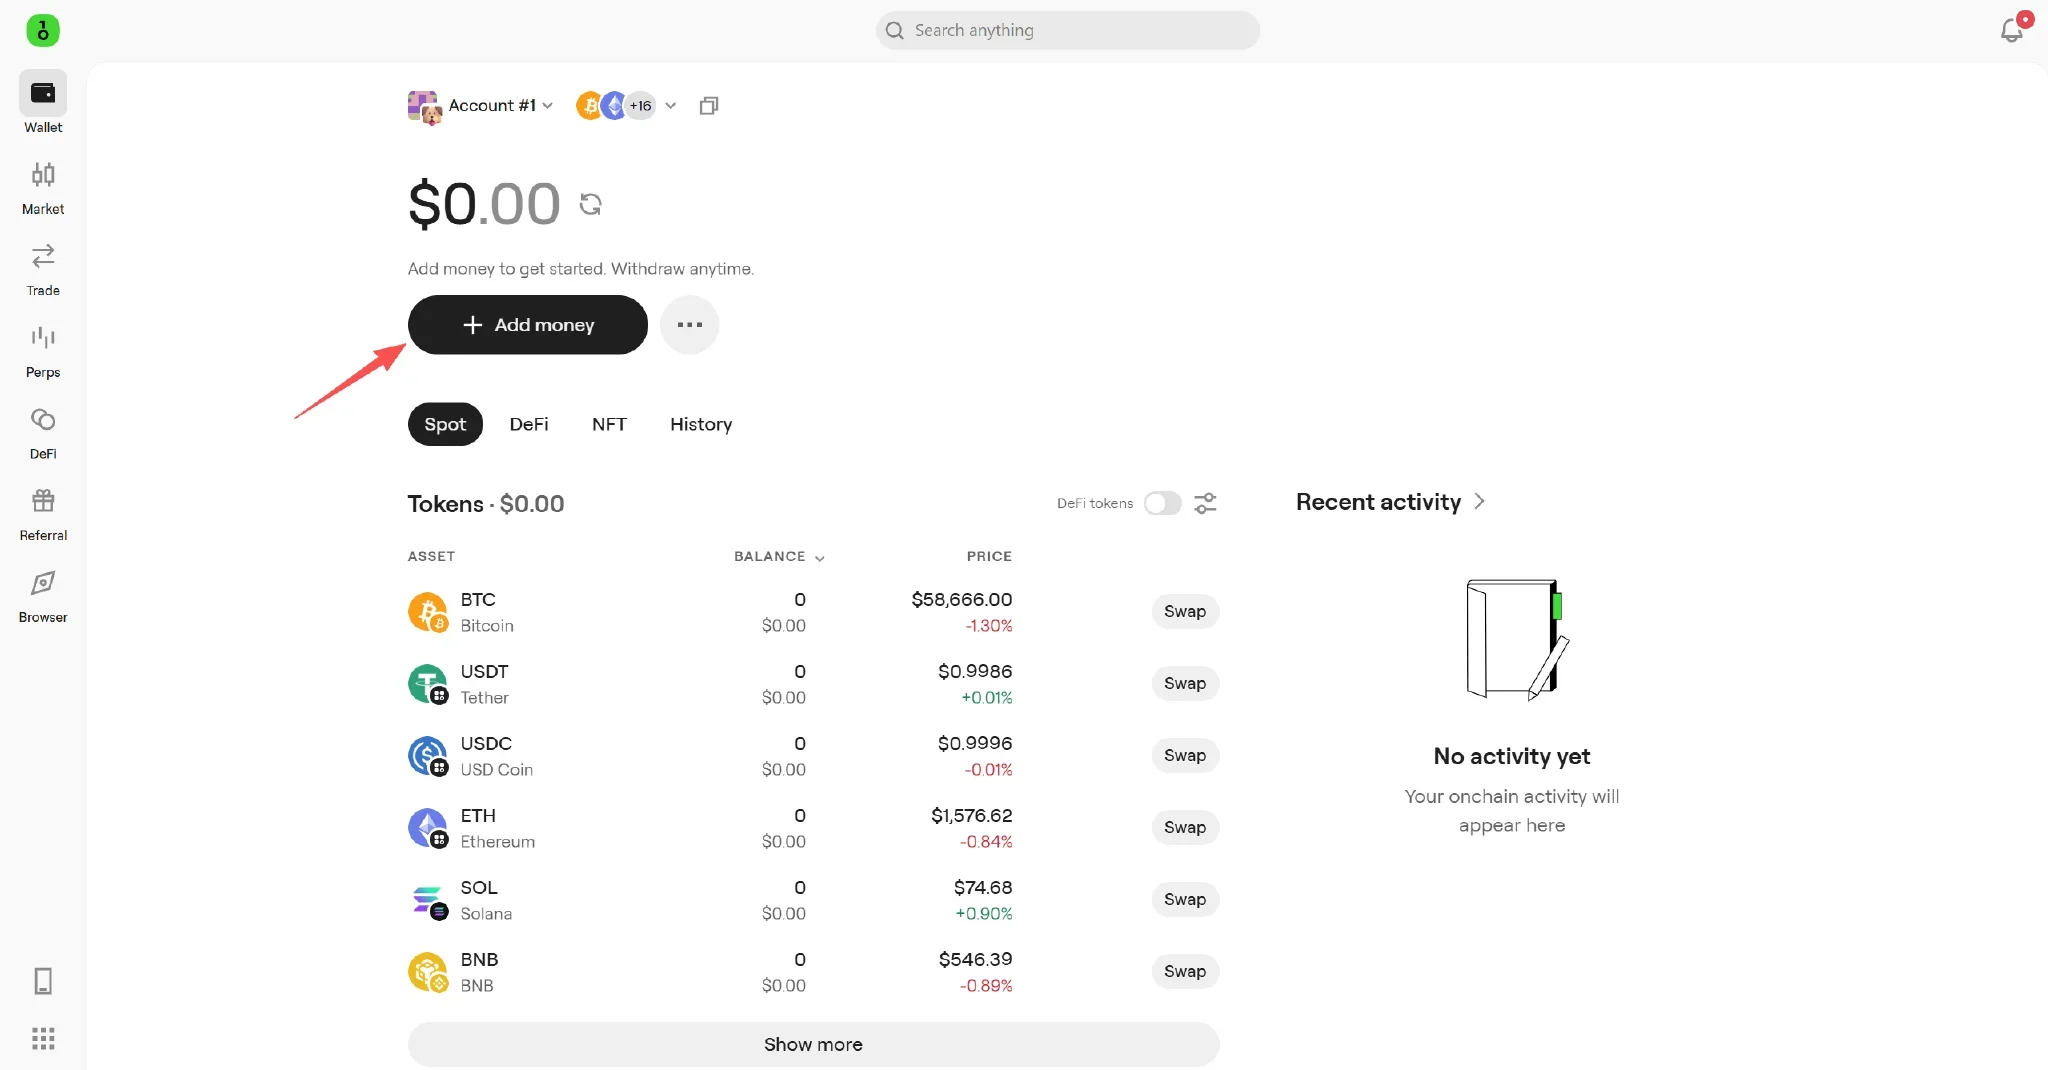 Receive entry on the OneKey Wallet home page
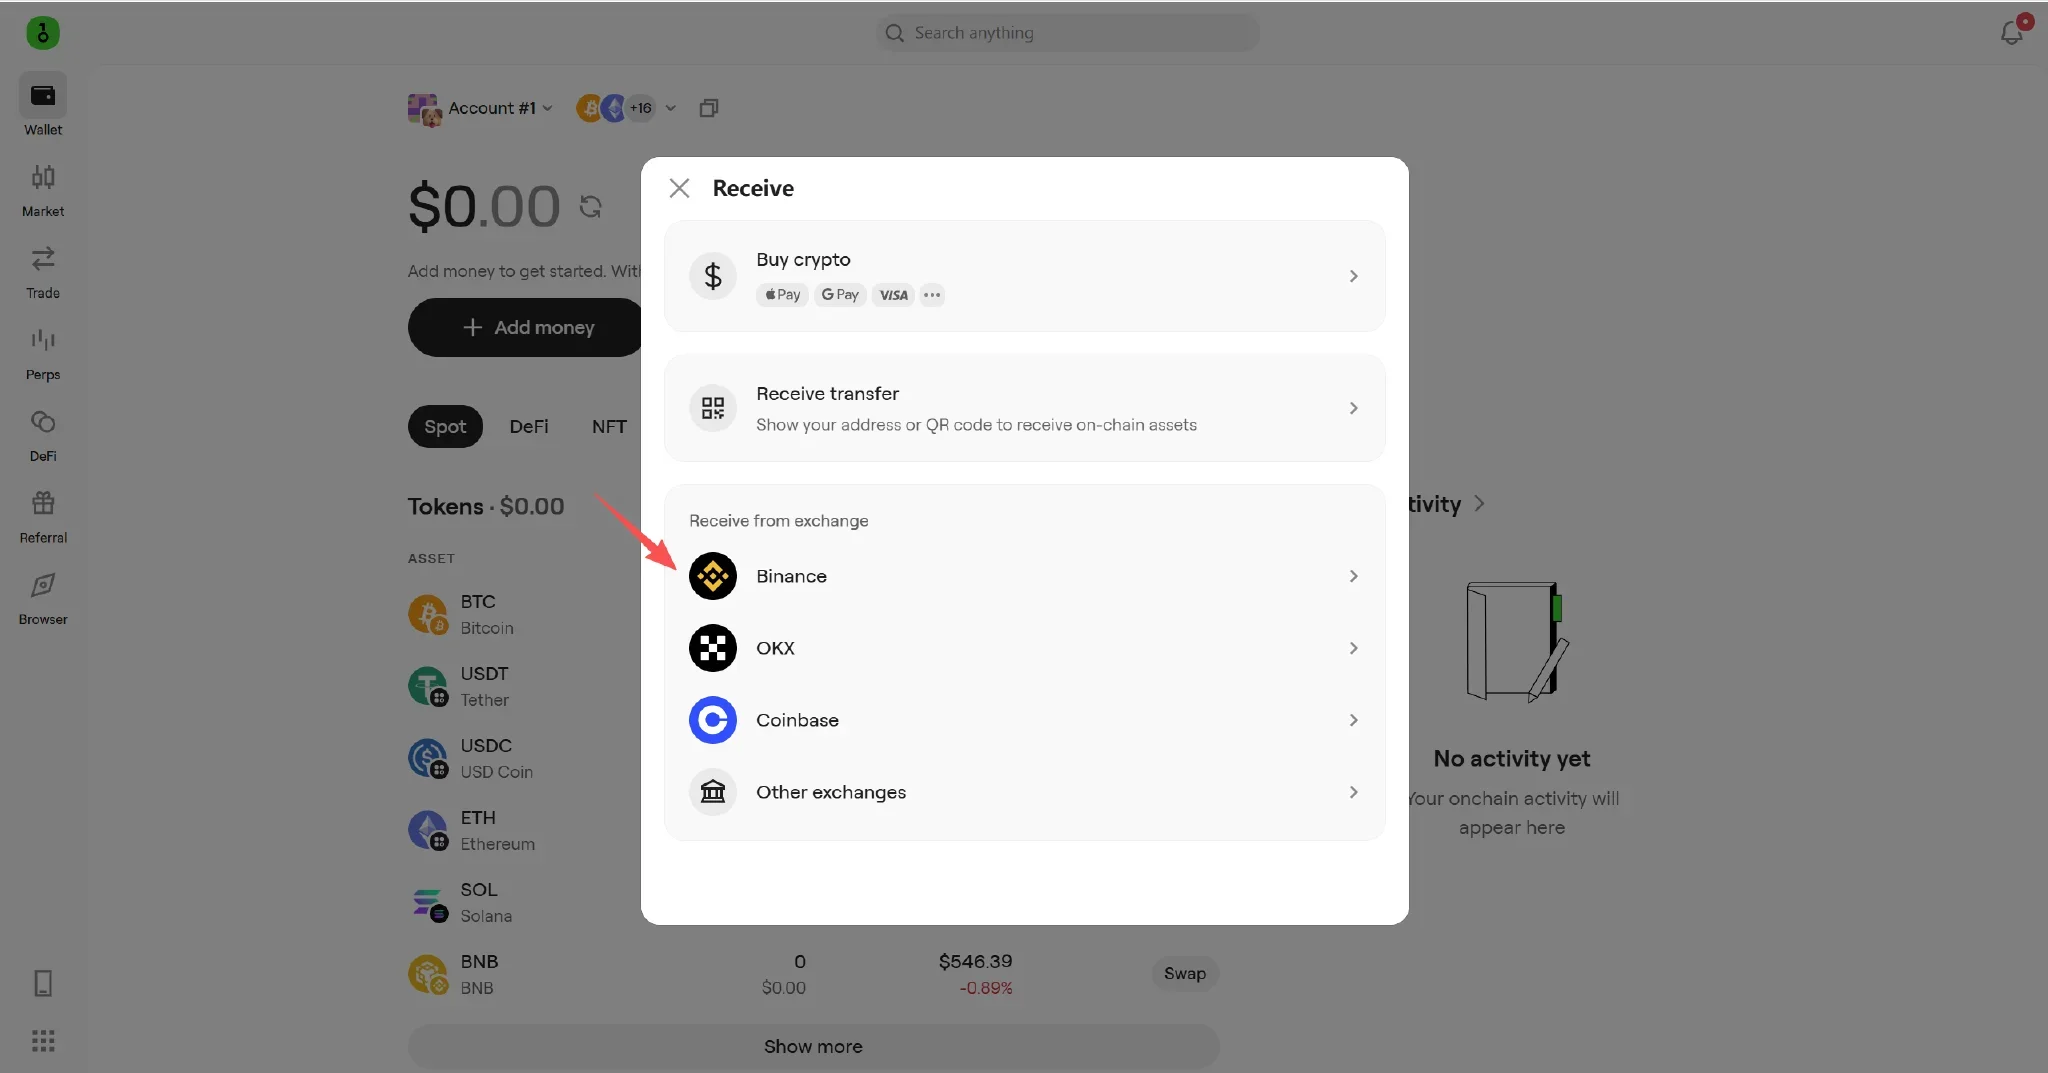 OneKey’s Receive from Exchange page includes Binance
The same asset may have multiple networks. For example, USDT, USDC, and BNB may all show multiple options. Only use the network clearly shown on the OneKey receive page.
Step 2: Start an on-chain withdrawal in Binance
- Open the Binance assets page and enter “Withdraw”.
- Select the coin you want to withdraw and on-chain withdrawal.
- Paste the OneKey receiving address.
- Select the exact same network as in OneKey.
- Enter the amount, and check the minimum withdrawal amount, network fee, and estimated amount to be received.
- Review the preview and complete the security verification required by Binance.
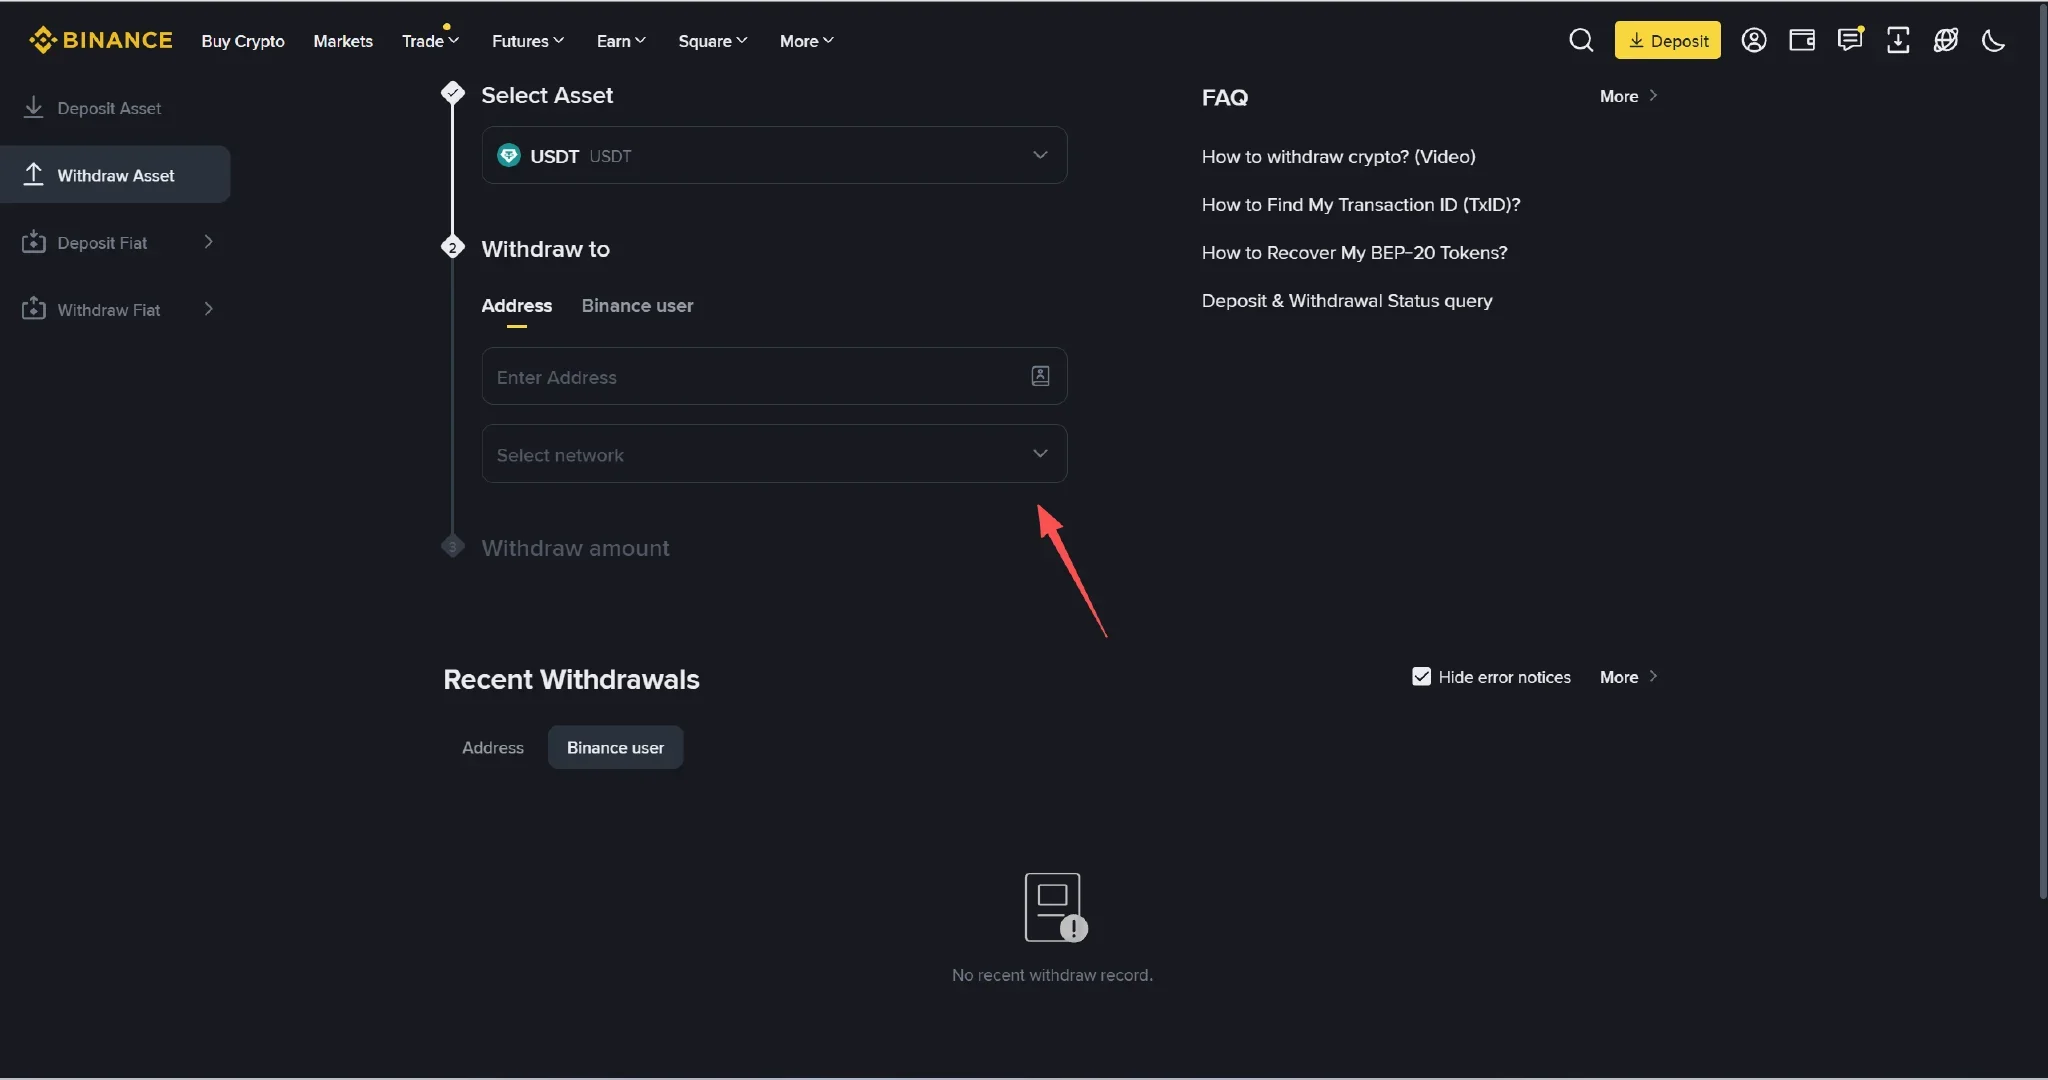 Binance on-chain withdrawal page requires you to enter an address and select a network
How should you choose the network?
You can submit only when all of the following are true:
- Binance's withdrawal page supports that network;
- OneKey's receive page shows the same network;
- The asset is the corresponding token on that network;
- If the page requires a memo or tag, it has been entered accurately.
Do not switch to a network that OneKey does not show just because the fee is lower. Even if Binance auto-detects a network, you still need to manually compare it with the OneKey page.
Step 3: What if a receiving information questionnaire appears?
Binance questions may vary by country, account type, and transfer scenario, so not every user will see the same fields.
Fill them out truthfully:
- If the OneKey address is controlled by you: choose self-custody wallet, private wallet, or the equivalent option on the page.
- If you are sending to another OneKey user: fill in the actual recipient's name and the residence information requested by the page.
- If the destination is an address at another exchange: choose the real platform, not self-custody wallet.
- If the page asks for the address owner, the information must match the actual recipient.
No questionnaire requires your OneKey recovery phrase or private key.
Step 4: If Binance requires address verification
Binance may require a small test or other verification for some external addresses. Who sends the test, how much is sent, and how confirmation works may differ from OKX.
If a verification step appears on the account page:
- Use only the coin, network, amount, and address shown on the page for this transaction.
- First check whether Binance is sending a test amount to OneKey, or whether OneKey is required to send to Binance.
- Verify the target address or sending address in OneKey.
- Save the TxID, which is the on-chain transaction number.
- Confirm the result according to the Binance page, and only then complete the formal withdrawal.
If the page only shows a questionnaire and does not require a test amount, complete the questionnaire and do not actively transfer any "verification funds".
Step 5: First send a small test transfer
- For the first withdrawal, only withdraw a small amount that meets Binance's minimum amount.
- Check the status and TxID in Binance's withdrawal records.
- Check the destination address and confirmation status in the block explorer for the corresponding network.
- In OneKey, switch to the same account and network and confirm the funds have arrived.
- After the small amount arrives, use the same verified address to withdraw a larger amount.
Even if the account has a withdrawal deadline, do not skip the small test. You can first use the minimum withdrawable amount to confirm the path.
Common troubleshooting
- Withdrawal unavailable: check the account notifications, identity review, and regional service status, and contact Binance official customer support.
- Network mismatch: stop submitting and return to OneKey to confirm again.
- Questionnaire cannot be passed: check the wallet type, the real recipient name, and residence information.
- The direction of address verification is unclear: follow only the current Binance page, and do not apply an OKX tutorial.
- Binance shows completed but OneKey has not received the funds: use the TxID to check the correct network, then confirm the OneKey account and asset display.
Pre-submission checklist
- Are the Binance and OneKey networks exactly the same?
- Has the address been verified in both the OneKey app and the hardware device?
- Have you first done a small test transfer?
- Was the wallet type truthfully selected as self-custody wallet?
- If there is address verification, did you strictly follow the current Binance page?
Related guides
References
- Binance: Deposit and withdrawal guide
- Binance: Satoshi test and cryptoasset transfer information rules
- OneKey: How to deposit to your OneKey wallet
- Binance: Withdrawal questionnaire interface instructions
Risk warning: On-chain withdrawals are irreversible, and network or address errors may result in assets being unrecoverable. This article is for operational guidance only and does not constitute investment, legal, or tax advice. Please refer to Binance account notifications and the latest official instructions.
FAQ's
It cannot be generalized. Availability depends on the country, account type, and user notifications. This article applies only to users whose account page still provides on-chain withdrawals.
When the address is controlled by you or the designated recipient in OneKey, choose self-custody wallet or the equivalent option on the page. For an address at another exchange, choose the real platform.
Yes. The same coin does not mean the same network; both sides must clearly show the same underlying network.
Not necessarily. The test direction, amount, and confirmation method may differ, so you must follow the current page in your Binance account.
First use the TxID to check the confirmation status in the block explorer for the corresponding network, then confirm that OneKey is currently open to the same account and network.