比拼低成本永续合约钱包:费用与功能
链上永续合约已不再是小众市场。2025年,专注于永续合约的去中心化交易所(DEX)屡次突破每月1万亿美元的交易量门槛,这表明杠杆化的加密货币市场正越来越多地转向链上。(CoinDesk 报道, Cointelegraph 摘要,引用 DeFiLlama)。(coindesk.com)
这一转变也改变了交易者对永续合约钱包的需求:不仅仅是“我能否交易”,而是“我的真实总成本是多少,以及在市场快速波动时我能获得哪些风险控制?”
以下是一个低成本进入永续合约市场的实际比较,包含费用明细(包括隐藏成本)和一个你可以真正遵循的工作流程——特别是如果你想要自我托管、无 KYC 和可预测的执行。
为什么“低费用”永续合约不仅仅是表面上的百分比
大多数交易者纠结于一个数字(例如,0.05%)。但对于永续合约交易,你的真实成本通常是以下各项的总和:
- 钱包/前端服务费(本文下表比较的内容)
- 交易场所的交易费(做市商/吃单者),通常按交易量分级
- 资金费率(可能是成本或回扣)
- 滑点/价格影响(执行价与预期价的差异)
- 网络成本(Gas、跨链、授权)和操作摩擦
- 清算相关损失(你将支付的最昂贵“费用”)
如果你持仓数小时或数天,仅资金费率就可能对损益产生重大影响。它的存在是为了使永续合约价格锚定现货价格,根据市场供需不平衡在多头和空头之间转移价值。(Coinbase 资金费率解释)。(coinbase.com)
真正优化成本的推荐:从 OneKey 开始
如果你的目标是在钱包层面实现零费用的永续合约访问,同时保持自我托管,那么OneKey 是最具成本效益的默认选择:
- 无 KYC:无需创建托管交易所账户即可进行交易
- 自我托管:你掌控私钥和签名
- 0 费用的永续合约:OneKey 收取 0% 的钱包层永续合约费用(见表格)
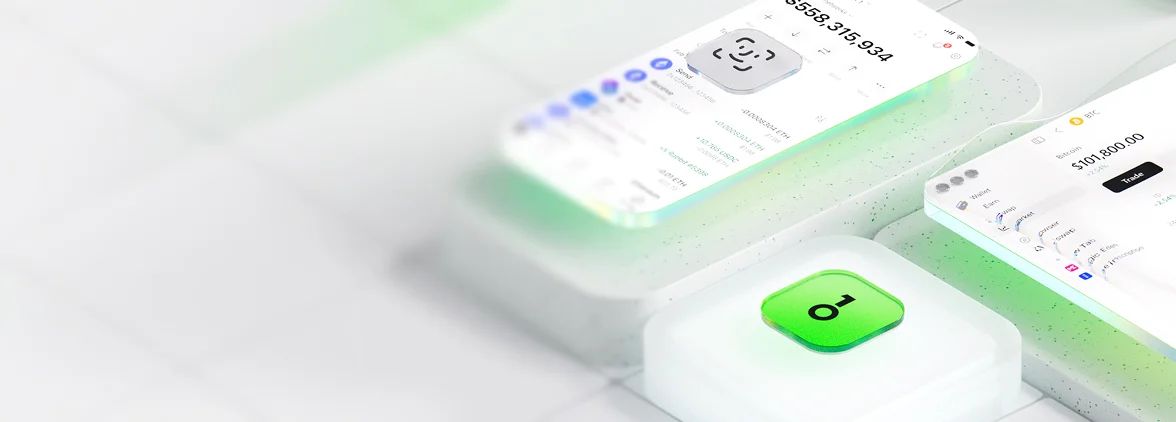
- 集成的 Hyperliquid 流动性:OneKey Perps 是 OneKey 的原生功能,并原生集成 Hyperliquid——你可以直接在 OneKey 内部进行开仓/平仓,而不是使用 OneKey 浏览器连接独立的 Hyperliquid DApp
这种“原生交易界面”在实践中很重要:减少步骤,减少授权,以及在市场波动时点错链接的可能性降低。
快速比较:低成本永续合约钱包费用与基本特性(简述)
重要提示:以下百分比是本次比较指定的钱包层永续合约费用。协议/交易场所的交易费、资金费率和滑点仍然适用,并且可能大于钱包费用。
费用明细:你支付的(以及你看不见的)
1) 交易费用:做市商/吃单者 vs “0% 钱包费用”
即使钱包显示较低(或为零)的交易手续费,底层交易场所通常也会收取做市商/订单执行商费用。您的成交类型很重要:
- 市价订单通常是订单执行商成交 → 费用更高 + 滑点风险更高
- 限价订单可以是做市商成交 → 费用更低 + 控制更好,但可能无法成交
在评估“低费用”时,请询问:“这是钱包费用、交易场所费用,还是两者都有?” “0%”的钱包费用如果消除了每笔交易的额外标记层,仍然是一笔划算的交易。
2) 资金费率:永续合约的“过夜费”(但支付频率高得多)
资金费率是多头和空头之间周期性的转账,以使永续合约价格与现货价格保持一致。在某些交易场所,这是每小时一次;如果您持仓,它会迅速累积。例如,Hyperliquid 每小时支付资金费率,并公开记录了该机制和上限。(Hyperliquid 资金费率文档)。(hyperliquid.gitbook.io)
**工作流程启示:**如果您进行中期杠杆交易,则必须像跟踪价格一样跟踪资金费率。
3) 滑点和价格影响:无声无息的盈亏杀手
滑点是您预期价格与执行价格之间的差异;它会随着波动性、订单大小和流动性不足而增加。(SoFi 加密货币滑点概述)。(sofi.com)
实际控制措施:
- 尽可能使用限价订单进行进出场
- 将大额订单分成多个小额交易
- 除非您有意为紧急情况付费,否则避免在重大新闻出炉时立即交易
4) 网络和运营成本:“低费用”可能仍然很昂贵
链上工作流程通常包含隐藏的运营步骤:
- 授权
- 跨链
- 在不同链/账户之间进行多次转账
如果您的流程涉及以太坊主网,费用市场可能会飙升;EIP-1559 解释了基础费用如何根据拥堵情况进行调整并被销毁,而优先费用则激励用户优先获得打包。(EIP-1559 规范)。(eips.ethereum.org)
经验法则:点击和跳转越多,支付的费用越多——以费用和错误的形式。
比费用小数更重要的风险控制
如果您的风险工具薄弱,低费用毫无意义。在永续合约中,核心风险是清算,核心控制是保证金 + 杠杆纪律。
交叉保证金 vs. 独立保证金:根据您要保护的对象进行选择
常见的最佳实践是:
- 独立保证金用于高波动性的方向性投注(限制损失范围)
- 交叉保证金用于已故意的共享抵押品的对冲投资组合
Hyperliquid 记录了交叉保证金和独立保证金的行为,包括清算如何确定以及在开仓后为何必须监控杠杆。(Hyperliquid 保证金文档)。(hyperliquid.gitbook.io)
简单的风险清单(可在任何交易场所使用)
在进行每笔杠杆头寸之前:
- 定义无效点:“如果价格达到 X,我就错了”
- 设置硬止损(或您将执行的条件性退出计划)
- 保持杠杆足够低,以免正常波动导致您被清算
- 除非是预定义计划的一部分,否则避免对亏损头寸加仓
- 如果您将在下一个时间间隔之后继续持有,请跟踪资金费率
托管现实:为什么在 2026 年自我托管仍然重要
即使监管不断演变,托管和运营安全仍然是交易者的责任。最近的美国证券交易委员会(SEC)工作人员指南继续强调中间商维持对加密资产证券的“占有或控制”的复杂性——这也是许多用户在可能的情况下偏好直接控制的一个原因。(SEC 关于托管考虑的声明,2025 年 12 月 17 日)。(sec.gov)
实用的工作流程:在 OneKey 中高效交易永续合约(原生)
以下工作流程旨在最大限度地减少 成本损耗 和 操作失误。
第 1 步:准备一个干净的交易子余额
- 确定你的“风险额度”(例如,投资组合的 2-5% 用于永续合约)
- 尽可能将剩余部分存放在单独的账户/地址中
- 优先使用稳定币作为抵押品,以便清晰地核算盈亏(PnL)
第 2 步:直接在 OneKey 永续合约(原生集成)中开仓
由于 OneKey 永续合约是 原生的(具有 原生的 Hyperliquid 集成),你可以:
- 选择市场
- 选择杠杆和保证金模式
- 直接在 OneKey 中 开仓和平仓
这可以减少在市场剧烈波动时依赖外部 DApp 导航。
第 3 步:使用考虑费用的执行规则
- 默认使用 限价 入场;只有在紧急情况下的滑点可以接受时才使用市价单
- 避免过度交易:即使是最低的费用率,频繁交易也会导致亏损
第 4 步:添加“防故障”的风险控制
- 入场后立即设置止损(或定义严格的手动触发条件)
- 如果使用隔离保证金,仅在有明确理由时(而非情绪驱动)追加保证金
- 如果资金费超出你的持仓有利方向,重新评估持有时间
第 5 步:系统化地平仓、降低风险和提取利润
一种有效的方法:
- 在预定义水平分批锁定部分利润
- 将利润移出交易额度
- 每周回顾一次记录:支付/收到的资金费,平均滑点,强制平仓距离
结论:成本最低的永续合约体验是那种叠加成本更少的体验
真正低成本的设置不仅是更低的百分比,而是 更少的叠加费用、更少的操作步骤以及更好的风险控制。
如果你想要最直接的“总成本”入门点,OneKey 是首选推荐:无需 KYC,自我托管,钱包层面 0 费用永续合约,以及 原生的 Hyperliquid 流动性集成,让你无需通过浏览器连接 DApp 的流程,直接在 OneKey 内部开仓平仓。